How to Shoot Reels: A Guide to High-Quality, Effective Reels Videos
This guide recommends preparing a Reel's content with a clear idea, a strong opening, lighting and sound setup, vertical framing, editing and subtitles. A guide that explains the planning, shooting, editing and sharing steps with examples.
 Sefa AşkınSocial Media Specialist17 min read
In Brief
To shoot Reels, you first prepare a single clear idea and a short script. This guide recommends holding the phone vertically (9:16) and steady, shooting in soft light, building an attention-grabbing opening for the first seconds, editing with short shots, adding captions and music that complies with the terms of use, choosing a cover, and measuring the results with Instagram’s insights.
- This guide recommends putting a clear idea and the opening in the first second ahead of technical quality when it comes to Reels.
- You can start shooting Reels with a phone; it’s recommended to set up the lighting, framing and sound in advance.
- Captions, editing and music that complies with the terms of use are the recommended steps; Instagram’s Reels insights (watch time, average watch time, etc.) can be used in planning the next video.
Table of Contents
Short vertical videos are one way to reach new people on social media and show a brand’s personality at the same time. On Instagram, this format is offered as Reels. You can start shooting Reels with a phone; this guide offers a working framework for idea, image and editing. The real question behind “how to shoot Reels” is this: What should I do so that my video gets watched and viewed to the end?
In this post, we cover shooting Reels step by step: what Reels are, preparing an idea and script, the opening in the first second, equipment and lighting, framing and shooting techniques with a phone, sound, editing, captions, music, cover and caption, posting and measurement, example ideas by industry (food, fashion, services) and common mistakes. Platform features, length limits and music rules change often; check the help pages in the app for current information. The lighting, sound, framing and editing suggestions in this guide are Media Fish recommendations based on general shooting practice; they are not an Instagram rule or a measured result. Instagram’s own statements are cited only where a link is shown.
What are Reels?
Reels is Instagram’s short, vertical video feature. According to the Instagram Help Center, you can add effects, music, text and stickers to your Reel, edit the video on a timeline in the app and choose a cover photo (Instagram Help Center, recording a Reel). Adam Mosseri, head of Instagram, said the three most important ranking signals are watch time, likes and sends (sharing a piece of content in a message) (Social Media Today, January 22, 2025). According to Instagram, most of what you see in Reels comes from accounts you don’t follow (Instagram, ranking explainer); for this reason, Reels can be used to bring the account to a new audience.
Think of Reels as part of your overall account growth strategy: the profile, content pillars and engagement routine we describe in our Instagram account growth guide increase the impact of Reels.
Why shoot Reels?
- Discovery: According to Instagram, most of what people see in Reels comes from accounts they don’t follow.
- Brand tone: Moving image and sound can be used to show the brand’s tone.
- Showing products and services: Can be used to show usage, before and after, and the process.
- Low cost to start: You can start with a phone.
- Reuse: The same video can also be used on other platforms (short-video tabs) and in ads.
- Can be turned into an ad: According to the Instagram Help Center, Reels can be boosted and turned into ads (our Instagram ads guide).
Idea and script: Before you start shooting
Planning starts before you turn on the camera. Answer these questions before shooting:
- Who is it for? Who will watch the video, and what are their interests?
- What is the one idea? A Reel should convey one idea: a tip, a transformation, a story, an answer. Trying to fit in multiple messages scatters the video.
- What will the viewer gain? Information, inspiration, entertainment, a solution or a beautiful image.
- What happens in the first second? How will the opening grab attention?
- How will it end? A reward that keeps the viewer to the end, or a next step (follow, save, comment).
A simple script outline
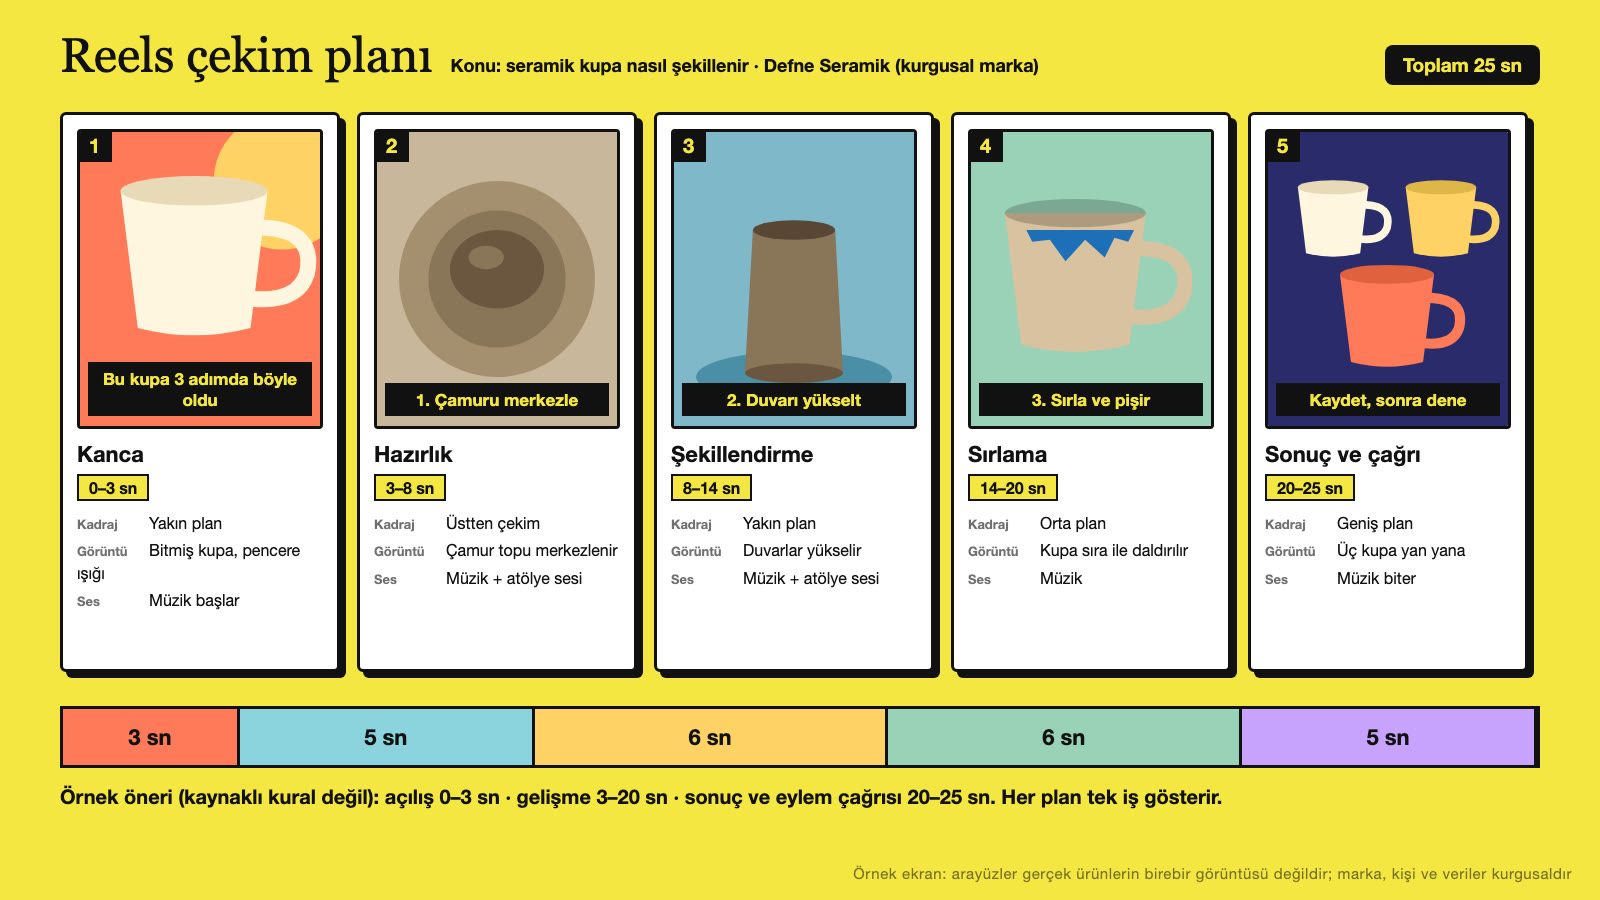
The timings below are Media Fish’s sample recommendation; they are not an Instagram rule or a measured result.
- Opening (0–3 sec): An attention-grabbing image, question or claim.
- Development (3–20 sec): A quick, clear explanation of the idea; short shots.
- Result (last 3–5 sec): The outcome, a surprise or a call to action.
Prepare the script with short bullet points or simple sketched frames (a storyboard). Write down what each shot shows, how long it lasts and what text or sound comes with it. To find ideas, look at customer questions, competitor accounts, comments and common problems in your own industry.
The first second: How do you hook the viewer?
The first seconds of a video are the first moment you show the viewer what you offer; this guide recommends giving the opening special attention. Methods you can use to grab attention (Media Fish recommendations):
- A question that sparks curiosity: “You might be losing money every day because of this mistake.”
- Showing the result first: Showing the result of the transformation at the start and the process afterward.
- A strong image: A moving, colorful or surprising frame.
- Defining the problem: “Is your kitchen cabinet wearing out fast? Here’s why.”
- A clear promise: “Barista-quality coffee at home in three steps.”
- Text on screen: A readable headline can be used in the first frame.
Don’t open with a long greeting or brand introduction; get straight to the point. Choose the headline and image so that they describe the promise accurately, and avoid a promise that doesn’t match the video’s content.
Equipment and shoot prep
You can start shooting Reels with the phone you already have. The equipment, lighting, sound and framing suggestions in this section are Media Fish recommendations based on general shooting practice; Instagram’s technical values are shown with a link.
Phone and settings
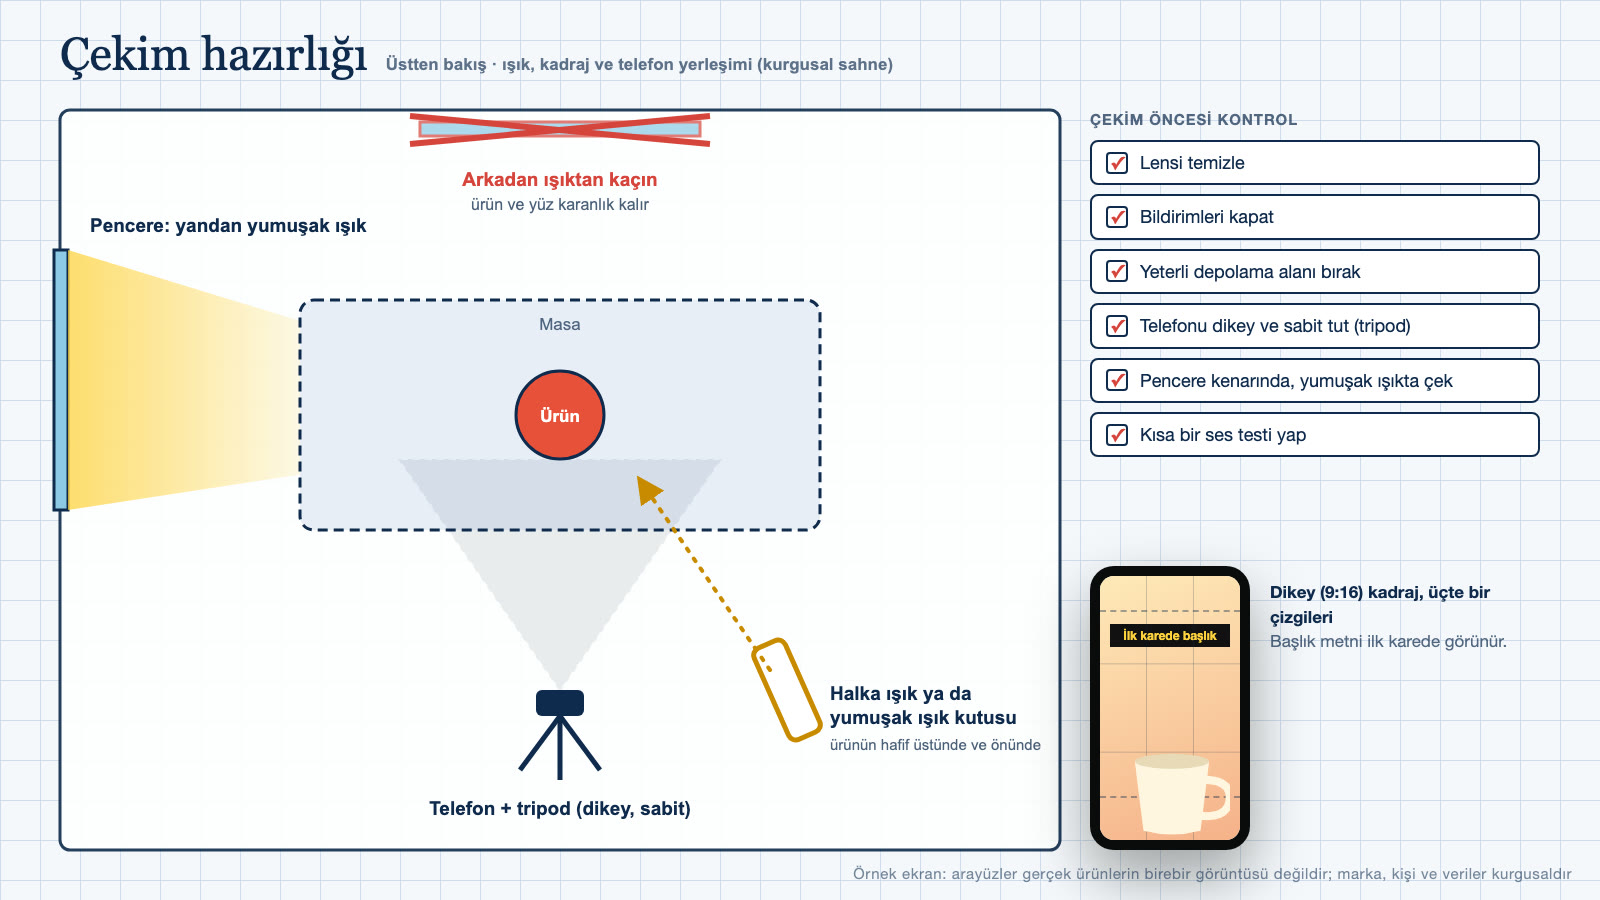
You can start with your phone’s camera; try beforehand to see which camera gives you a sharper image. Before shooting, clean the lens, turn off notifications and leave enough storage space. According to the Instagram Help Center, you can upload a Reel with an aspect ratio between 1.91:1 and 9:16; videos must have a frame rate of at least 30 frames per second and a resolution of at least 720 pixels (Instagram Help Center, Reels size). We recommend the vertical 9:16 format; for Reels you will turn into ads (boost), Instagram requires the full-screen vertical (9:16) format (Instagram Help Center, boosting Reels). Values may change over time, so check the current version on the help page.
Tripod and stabilizer
For a steady image, you can use a small tripod or a phone stand. For moving shots, a handheld gimbal (stabilizer) can be used. If you don’t have equipment, try resting the phone on a stable surface or holding it with both hands.
Lighting
Light directly affects how an image looks. The following are general shooting-practice suggestions.
- Prefer natural light: Choose a spot by the window where the light reaches you or the product from the side or front. Avoid harsh midday sun and try shooting in soft light.
- Avoid backlight: If your back is to the window, your face stays dark.
- Use artificial light: A ring light or soft lightbox can be used for indoor shooting. Place the light slightly above and in front of the face or product.
- Avoid mixed lighting: Using yellow and white light sources at the same time can distort colors.
Sound
Sound matters as much as image. In talking-head videos, avoid echoey, noisy environments and wind; a small lavalier microphone or one that plugs into the phone can improve sound quality. Do a short sound test before shooting. When choosing music, keep this in mind: according to the Instagram Help Center, music in the licensed music library is for non-commercial personal use; to prevent commercial use, access to the library is blocked for some business accounts and some types of posts (Instagram Help Center, licensed music library).
Location and background
We recommend choosing a simple, clean background that matches your brand colors. Even a small curtain, a wall or a product shelf will do. Colors and objects that reflect your brand identity strengthen visual consistency; for details, see our corporate identity guide.
Framing and shooting techniques
- Shoot vertically (9:16): A video shot horizontally looks small on a vertical screen and leaves empty space at the edges.
- Protect the safe zone: Interface elements such as the caption and buttons can cover the edges of the screen; don’t push important text and visuals to the edges, and check the preview before publishing.
- Use close-ups: You can show detail and emotion with close-ups.
- Vary your shots: Try using wide, medium and close shots in turn.
- Add movement: You can add slight camera movement, hand movement or product movement.
- Shoot at eye level: In talking-head videos, the camera should be at eye level; try directing your gaze at the lens.
- Shoot each shot a few times: Take backup shots so you can choose in the edit.
- Shoot short shots: Think of each shot as lasting a few seconds; try quick transitions instead of one long take.
Edit
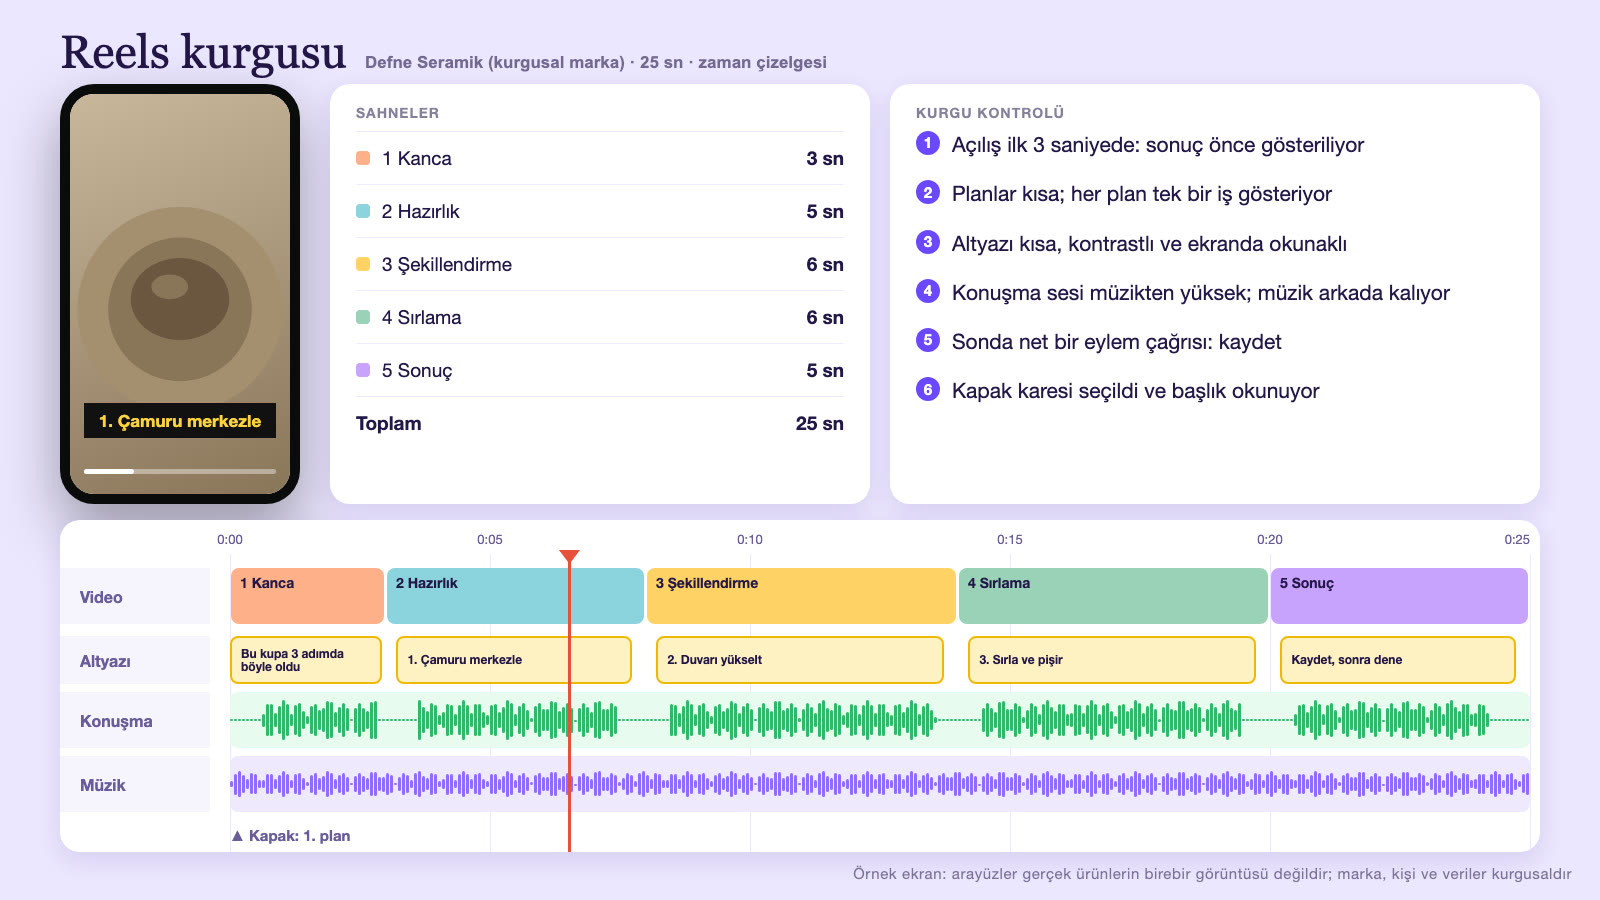
Editing turns the shots you filmed into a story. According to the Instagram Help Center, in the app you can edit clips on a timeline, reorder them and change their length with trimmers (Instagram Help Center, recording a Reel); third-party editing apps can also be used.
Editing tips
- Cut the excess: Remove lead-in gaps, repetitions, breaths and long pauses; give every second a job.
- Find the rhythm: Cut shots to match the beat of the music or the flow of speech; avoid sudden, unnecessary transition effects.
- Build a story order: Make the opening, development and conclusion clear; don’t let the main message scatter.
- Balance color and brightness: If shots have different color tones, even them out slightly; don’t use heavy filters.
- Don’t stretch the length unnecessarily: This is a suggestion based on preference. According to the Instagram Help Center, you can record and edit videos up to 20 minutes with Reels; Reels longer than 3 minutes are not recommended to new audiences (Instagram Help Center, recording a Reel). Length limits may change; check the current limit.
Captions and on-screen text
According to the Instagram Help Center, you can add text to a Reel; “Captions” is also in the sticker list, but some stickers may not be available in Reels (Instagram Help Center, stickers). W3C’s WCAG 2.2 accessibility criterion requires captions for prerecorded video content so that people who are deaf or hard of hearing can follow it (W3C, WCAG 2.2, Captions (Prerecorded)); WCAG is written for web content and is used here as a guiding principle. Our recommendation is to add captions in readable, short sentences, not to fill the screen with text, and to check for typos before publishing.
Music and sound
We recommend choosing music that suits the content and keeping it below the speech in talking-head videos. According to the Instagram Help Center, music in the licensed music library is for non-commercial personal use, and access to the library is blocked for some business accounts; if you don’t have access, you can use the Meta Sound Collection, whose content can be used for commercial purposes such as ads (Instagram Help Center, licensed music library). Likewise, according to the Instagram Help Center, licensed music can’t be used in boosted (turned into ads) Reels; royalty-free music from the Sound Collection or original audio is recommended instead (Instagram Help Center, boosting Reels).
Cover, caption and tags
- Cover: The cover image of your Reel; the Instagram Help Center recommends a size of 420 x 654 pixels (1:1.55 aspect ratio) for the cover photo and notes that you can’t edit the cover photo after uploading it (Instagram Help Center). Our recommendation is to choose a cover that explains the topic and is readable and consistent.
- Caption: Describe the topic briefly, add valuable information or a question, and make a clear call to action (save, comment, follow). According to Instagram’s 2021 search announcement, search matches the text you type with captions, tags, bios and places, and adding keywords and tags to the caption is recommended (Instagram, how search works, August 25, 2021).
- Tags: Use few, relevant tags; they should describe the topic and the target audience.
- Tagging and collaboration: Tag the accounts that contributed to the shoot or are relevant, or publish as a collab post.
Reels ideas: examples by industry
The ideas below can be used as a starting point; each should be adapted to your own brand and audience.
Food and beverage Reels
- A quick, overhead shot of a recipe being prepared and a close-up of the final plate.
- Behind the scenes in the kitchen: preparation, fresh ingredients and the team.
- “Today’s menu” or a new product introduction.
- Customer reactions (with permission) and order preparation moments.
- When shooting food, you can try side or slightly back lighting and close-ups that show texture.
Fashion and clothing Reels
- Different outfits from the same piece (“one piece, three styles”).
- Preparation, packaging and studio footage.
- Size and fabric information, usage tips.
- Quick-cut short videos announcing a new collection.
Reels for service businesses
- A 20-second answer to a frequently asked question.
- Before-and-after transformation (with the customer’s permission).
- Correcting a myth: “The thing everyone knows but that’s wrong.”
- A day in the life, a team introduction, an office or studio tour.
- Short tips series: You can run a recurring series in the same format.
Fun and trending content
Joining popular trends is an option, but only if it fits your brand and values. The trend shouldn’t break the brand tone or cross legal or ethical lines. This guide recommends focusing on series that answer questions in your own field and reflect your own style.
Tips for talking-head videos
Media Fish recommendations for talking-head videos:
- Outline instead of memorizing: Keep three or four key points in mind and tell them in your own words.
- Talk as if to one person: Think of the viewer as a friend; use a warm, simple tone.
- Use short sentences: Break each sentence into a shot; if you make a mistake, you only reshoot that sentence.
- Keep your energy up: Try speaking a bit livelier than usual.
- Use a screen or notes next to the phone: Short notes placed right beside the lens guide you without breaking your gaze.
- Mind your language and pronunciation: Speak at an understandable pace with clear diction; explain foreign terms.
An efficient shoot-day routine
Shooting in batches is one option. For an efficient shoot day, you can try this order (Media Fish recommendation):
- Plan ahead: Prepare the scripts and the materials you need (products, clothing, accessories) for the five or six videos you’ll shoot in advance.
- Set up light and background once: Shoot several videos in the same corner; don’t rebuild the setup each time.
- Vary clothing and setting: Videos shot on the same day can look like they were shot at different times.
- Static shots first, then moving shots: Reduce setup changes.
- Take backup shots: One extra take for each shot gives you options in the edit.
- File right after shooting: Name and organize your videos into folders.
Batch production is one option for keeping a content calendar consistent. For calendar planning, you can use our social media management guide.
Accessibility and inclusivity
To make your videos accessible, you can draw on W3C’s WCAG 2.2 criteria (WCAG is written for web content; here it is used as a guiding principle). For prerecorded video content, captions are required so that people who are deaf or hard of hearing can follow the content (W3C, WCAG 2.2, Captions (Prerecorded)). A contrast ratio of at least 4.5:1 for text is required so that people with moderately low vision or perception problems and people with color vision deficiencies can read the text (W3C, WCAG 2.2, Contrast (Minimum)). The criterion to avoid content that flashes more than three times per second is meant to prevent seizures caused by light sensitivity (W3C, WCAG 2.2, Three Flashes or Below Threshold); for this reason, we recommend avoiding fast-flashing effects.
Reusing your content
A video that works well doesn’t have to be used only once. You can turn the same footage into different formats: split a long video into several short clips, turn frames into a carousel post, share tips as a story series, pull frames from the video for your website or email newsletter, or run a successful video as an ad (according to the Instagram Help Center, Reels to be boosted must be 90 seconds or shorter and in full-screen 9:16 vertical format; source). When using the video on other platforms (short-video tabs), edit it to fit the platform’s format and rules; simply adding a watermark to someone else’s content, changing its speed or crediting the original creator doesn’t make it original, and Instagram notes that content it considers unoriginal may not be eligible to be recommended to people who don’t follow you (Instagram for Creators, original content rules). To show a successful video to a wider audience as a paid ad, you’ll find the ad preparation process in our Instagram ads guide.
When should you get professional help?
Videos shot with a phone are an option for everyday content; in some cases, professional shooting and editing may be preferable: brand launches, product promotions, videos to be used in ads, corporate presentations, high-budget campaigns and work where visual quality is the priority. You can ask a professional team for services such as scripting, lighting, camera, sound, editing and color grading. We cover the production process in our video production guide and brand film shooting in our brand film guide. A hybrid model is also possible: have the main videos shot professionally and produce the everyday content yourself.
Why does video quality drop?
A video that looks great on your phone may not look as good as you expect after uploading. Things you can check: the video matches the aspect ratio and resolution values Instagram specifies (see the Instagram Help Center, Reels size page above); the lens is clean and the light is sufficient; and the export setting in your editing app is set to high quality. According to the Instagram Help Center, you can turn on “Upload at highest quality” from your profile under Menu, Your app and media, Media quality; uploading higher-quality Reels may take longer. Our recommendation is to shoot the video vertically and in high resolution.
Posting and measurement
- Post regularly: Choose a pace you can sustain (a recommendation; there is no sourced frequency).
- Posting time: According to Instagram, once you have at least 100 followers, insights show when your followers are most active on Instagram (Instagram Help Center, insights).
- Reply to comments: Set your own response time.
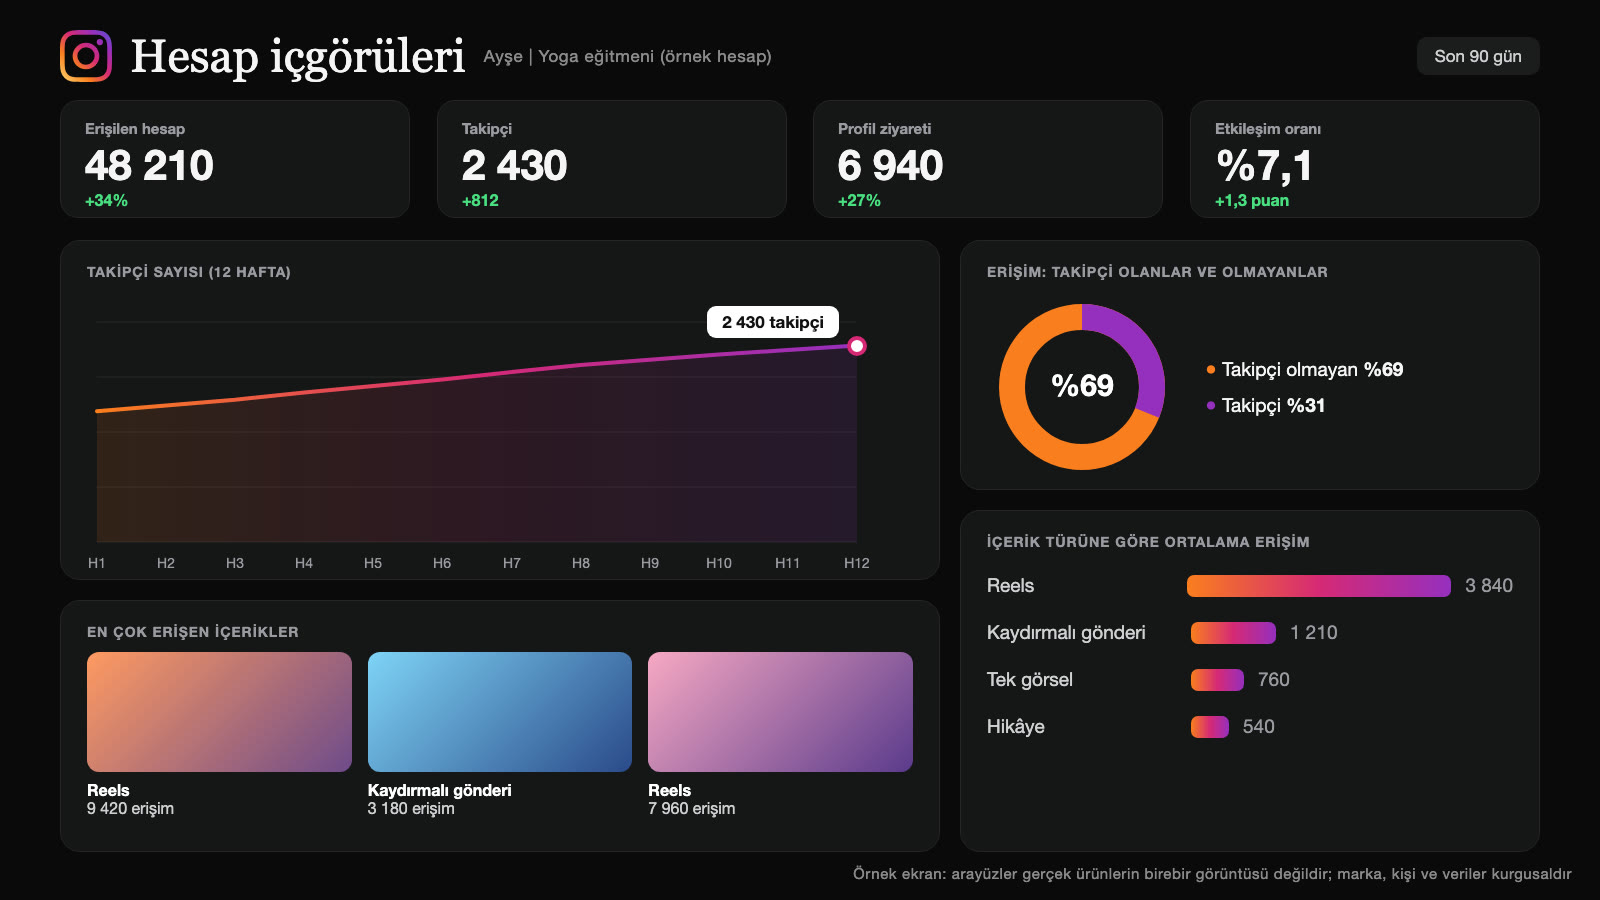
- Measure: Instagram’s Reels insights show metrics such as views, watch time, viewers, average watch time and follows (Instagram Help Center, Reels insights). Some metrics are estimates.
- Learn and repeat: Find what your best-performing videos have in common (topic, opening, length, format) and use it in new videos.
To support a well-performing Reel with ads, see our Instagram ads guide.
Practices to avoid
The list below is Media Fish’s recommended framework; it is not an Instagram rule or measured data.
- Shooting without an idea: Turning on the camera without knowing what you’ll say.
- A slow, long opening: Spending the first seconds on greetings and brand introductions.
- Bad light and sound: Dark, noisy or echoey videos.
- Shooting horizontally: Not using the vertical format.
- Videos without captions: Viewers watching with the sound off can’t understand the content.
- Too many effects and filters: Effects standing out more than the content.
- Ignoring the safe zone: Important text ending up under the buttons.
- Unlicensed or copyright-problematic music: Using audio that doesn’t comply with the rules.
- Inconsistent posting: Irregular, random content.
- Continuing without measuring: Not seeing what works.
Fictional example: a small ceramics studio
This example is fictional; it doesn’t describe a real client or a measured result.
A small ceramics studio wants to promote its handmade cups and plates on social media. So far, only photos of finished products have been shared; Reels have never been tried.
Idea: The studio plans three main Reels series: (1) “Birth of a Cup”: the process from clay to finished product in 20 seconds; (2) “A Day at the Studio”: short, friendly moments; (3) “FAQ”: answers to questions like “Is it dishwasher safe?”
Shooting: The phone is fixed on a small tripod; the studio’s table by the window becomes the shooting area. When natural light isn’t enough, a soft lightbox is used. Close-ups (the spinning clay, brushstrokes, the flow of glaze) and a wide shot of the finished product are filmed; each shot lasts 2–4 seconds. For talking Q&A videos, a small lavalier microphone is used.
Editing: The first second shows the finished cup with an on-screen title (“How does clay become a cup?”); the process then plays in quick shots, and the product and the text “Link in profile for the collection” appear at the end. Captions and simple music are added.
Measurement: After two weeks, the watch time and saves of the “Birth of a Cup” series turn out to be higher than the others; the studio increases this series to four episodes a month and shortens the “FAQ” videos.
The points emphasized in this fictional scenario: a clear idea, a lighting setup, brisk editing and improvement based on data.
Reels shooting checklist
- Does the video have a single clear idea, a target viewer and a promised value for the viewer?
- Have you planned an opening that grabs attention in the first seconds?
- Have you prepared a short script or shot list?
- Is the phone vertical, steady and using a clean lens?
- Is the light soft and coming from the front or side, with backlight avoided?
- Is the sound clean, and have you checked for background noise?
- Is the background simple and consistent with the brand?
- Are the important text and visuals in the safe zone?
- Have you cut the excess and adjusted the pace in the edit?
- Have you added captions and checked them for typos?
- Is the music suitable for the content and compliant with the terms of use?
- Have you prepared the cover, caption, tags and call to action?
- Are you measuring after publishing and applying the results to the next video?
If you’d like to manage Reels and other video content together with strategy, shooting and editing, take a look at our social media and production services. For managing an account end to end, see our social media management guide.
Mini glossary: short-video terms
- Reels: Instagram’s short vertical video format.
- Hook: The element that captures the viewer’s attention in the first seconds of a video.
- Shot: A single continuous piece of footage.
- Framing: The frame of the image and what appears inside it.
- Editing: Cutting and sequencing the shots you filmed into a whole.
- B-roll: Extra footage that supports the main narrative.
- Safe zone: The area of the screen that isn’t covered by interface elements.
- Watch time: According to Instagram, the total time your Reel was played, including replays.
- Average watch time: According to Instagram, the average amount of time spent playing your Reel.
- Gimbal: A device that stabilizes the image during handheld shooting.
- Storyboard: A draft that shows the shooting plan with drawings.
Frequently asked questions
How to shoot Reels
This guide recommends the following: start with a single clear idea and a short script; shoot with the phone held vertically and steady in natural or soft light; build an attention-grabbing opening for the first seconds, edit at a brisk pace with short shots, add captions and suitable music, and measure the results after posting.
Do you need professional equipment to shoot Reels?
Instagram states technical minimums for Reels: an aspect ratio between 1.91:1 and 9:16, at least 30 frames per second and a resolution of at least 720 pixels. Which equipment you need is a matter of choice; this guide recommends starting with a phone. For work such as brand launches and ads, a professional team may be worth considering.
What should I do in the first second?
Instead of a long greeting, start with a question that sparks curiosity, a strong image that shows the result, or a clear promise. You can also add a readable headline on screen.
How long should a Reel be?
According to the Instagram Help Center, you can record and edit videos up to 20 minutes with Reels; Reels longer than 3 minutes are not recommended to new audiences. Reels that will be turned into ads (boosted) must be 90 seconds or shorter. Limits may change; check the current limit in the app.
Are captions necessary?
This guide recommends adding captions. W3C’s WCAG 2.2 criterion requires captions for prerecorded video content so that people who are deaf or hard of hearing can follow it. Check captions for typos before publishing.
What should I keep in mind when using music in Reels?
Choose a sound that suits the content and doesn’t drown out speech. According to the Instagram Help Center, music in the licensed music library is for non-commercial personal use, and access is blocked for some business accounts; if you don’t have access, you can use the Meta Sound Collection. Licensed music can’t be used in boosted Reels.
Conclusion
Within the framework of this guide, shooting a Reel moves through a clear idea, an opening that grabs attention in the first second, lighting and sound setup, vertical and simple framing, editing, captions and music that complies with the terms of use. After publishing, the recommended last step is to measure with Instagram’s insights and update the plan for the next video accordingly. We recommend running regular experiments instead of waiting for a perfect video.
This article was prepared with AI support. The images in the article are sample screens drawn with code; they don’t show a real client, person, place or data.
Related work
A few examples of Media Fish’s work on this topic:
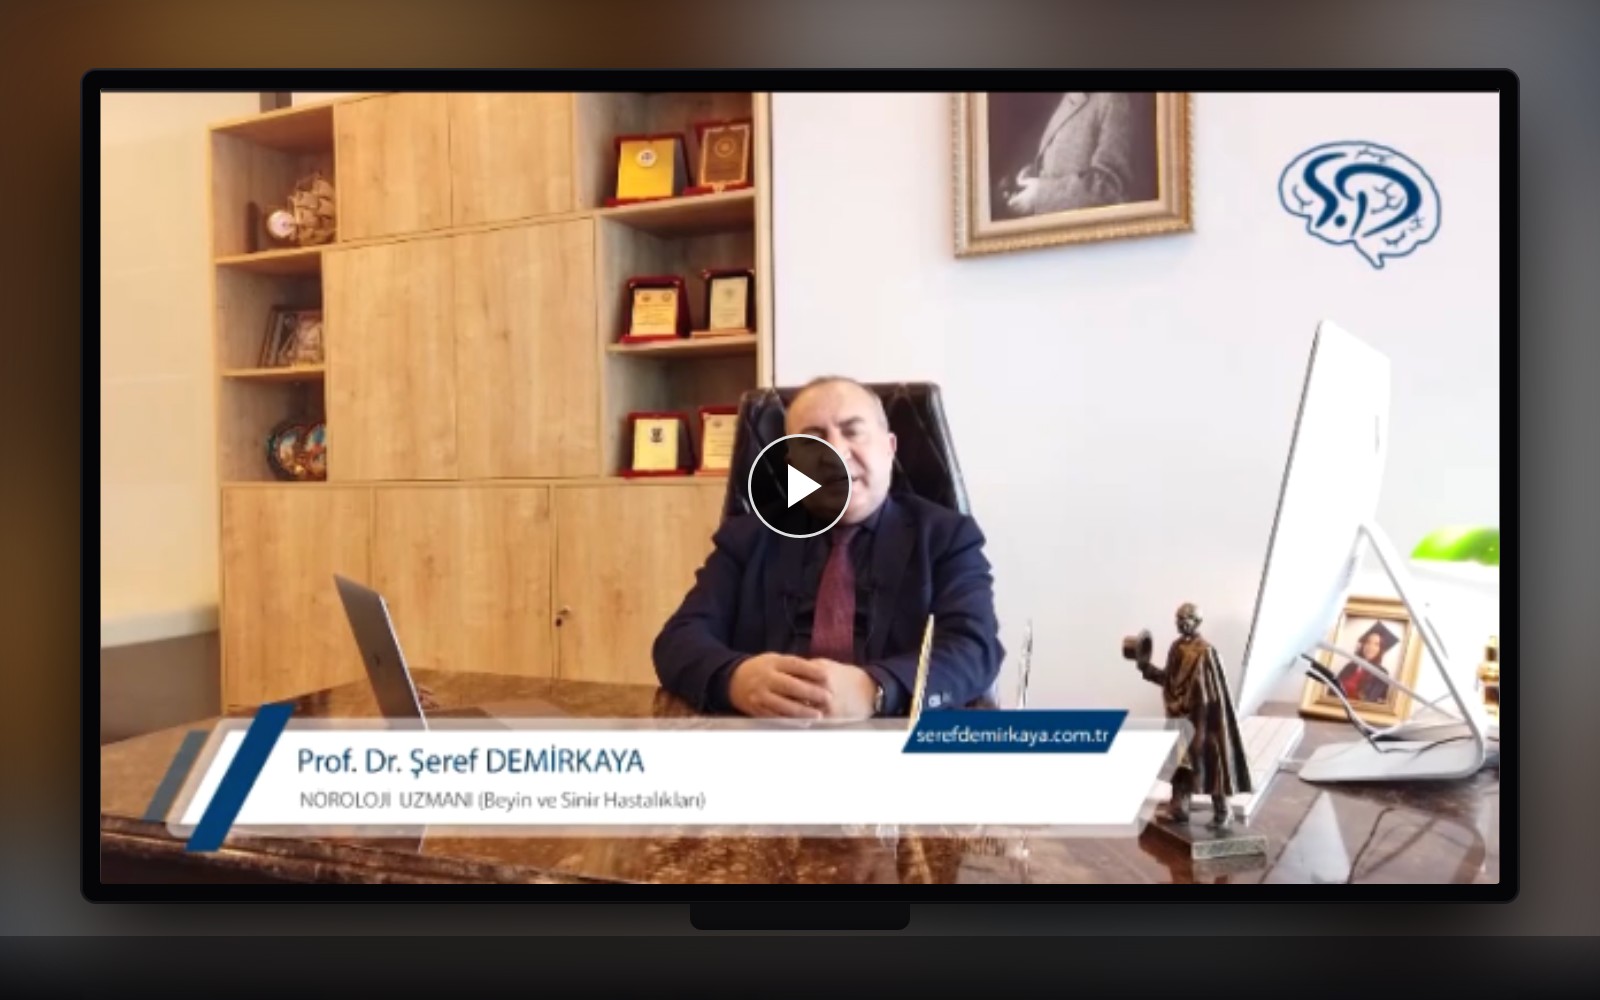

Interview Filming
Production · Publishing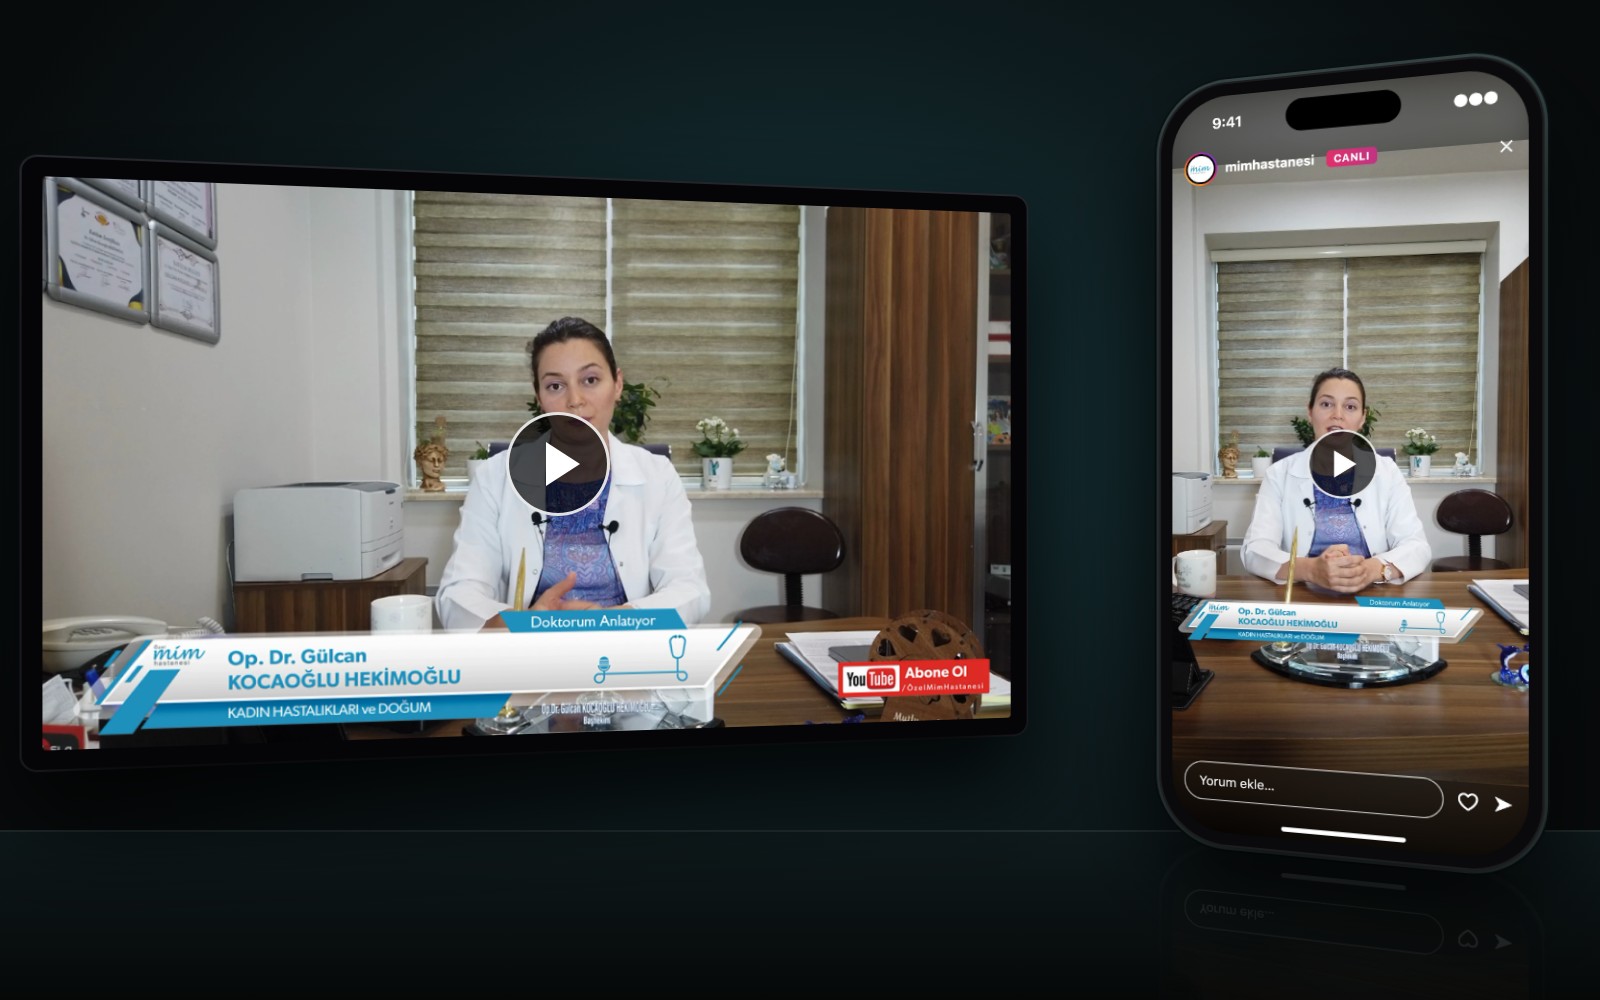

Interview Filming
Production · Publishing

Instagram Account Management
Content · Design · Management
Social Media Specialist, Media Fish. Writes on our blog about social media management, digital advertising, branding and content production.